
USER GUIDE
Infusion Plus Resources

PUMP USER GUIDE
PUMP USER GUIDES
Curlin
WHAT IS IT?
CURLIN SETUP
- Change batteries of pump and POWER ON
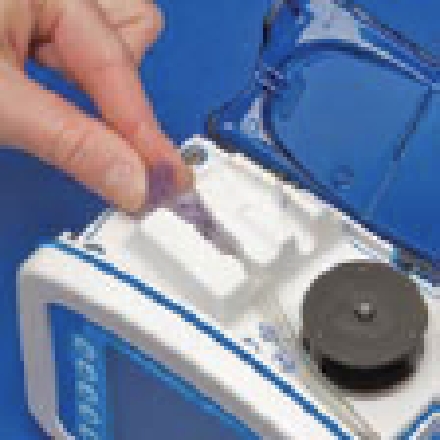
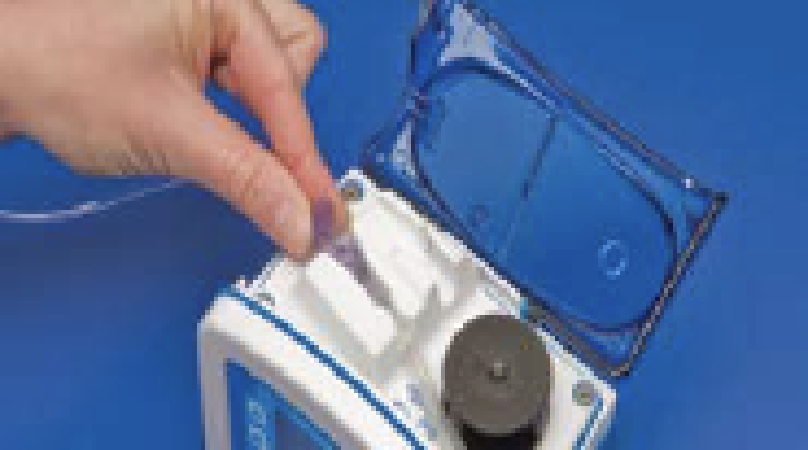
- Open pump: There is a metal lever on top (says “LIFT TO OPEN”); lift lever then pull open the metal part (pulls open to the right)
- ATTACH TUBING TO PUMP:
- Find the yellow square; this fits in a hole on the left (there is an arrow pointing to spot)
- Lay tubing along the top to bring blue square to right side
- Blue square fits in a hole on the right {also an arrow point to spot); You may
need to pull tubing tight to get blue square in securely - Close metal “door back over pump and push down lever latch to close
- BEFORE CLOSING, MAKE SURE THE TUBING JUST BELOW THE BLUE SQUARE (WHERE THE DOOR HINGE IS) MOVE OUT OF THE WAY OF THE METAL DOOR OR IT WILL NOT LET IT CLOSE
- LOOK AT PUMP SCREEN - the word “PROGRAM” is highlighted
- Push YES (green key)
- Use down arrow to highlight “REPEAT RX”
- Push YES
- The pump screen will start scrolling through the current pump settings - just let it do this and when it gets done, the screen will say “RUN to start” at top of screen
- PRIME tubing
- Push dark green “PRIME” button at bottom right of pump
- Make sure clamps are open and end cap is off of the end of the tubing
- HOLD DOWN the prime button; pump will start priming; let it get all air out of line (TPN to the end of the line)
- Push YES to exit when done
- Connect tubing to patient
- Push the RUN/PAUSE button (top right of pump) to start
Cadd-Solis
NOTE: this downloadable guide contains all information PLUS troubleshooting guides, alarms & messaging meaning
OPERATING THE PUMP
POWER SERVICES
AA BATTERIES
To power the CADD®-Solis VIP pump, it is recommended that four AA, 1.5 volt non-rechargeable alkaline batteries are used or the CADD®-Solis pump rechargeable battery pack.
Note: Mixing new and used batteries is not recommended because it may affect low battery alarm times. Always use four new batteries when replacing depleted batteries.
The pump retains all programmed values when the batteries are removed, but the batteries must be in place during delivery. If the batteries are removed while the pump is delivering, and an AC adapter is connected, delivery stops. If an AC adapter is not connected and the batteries are removed, delivery stops and the pump loses power.
The AC adapter can be used as an alternate source of power for the pump and/or to recharge the rechargeable battery pack. The pump requires AA batteries or the rechargeable battery pack to be installed as a backup while using the AC adapter.
The rechargeable battery pack is an alternative to using four AA batteries. The rechargeable battery pack can be recharged with the AC adapter, either inside or outside of the pump.
INSTALLING BATTERIES OR BATTERY PACK
- Make sure the pump is stopped and powered off. Using your fingers, the pump key, or a coin, turn the knob on the battery door counterclockwise to open the battery door.
- Hold the pump at an angle and place four AA batteries in the pump, from the bottom up. Match the + and - markings on the new batteries with the markings on the pump.
- Close the battery door and using your fingers, the pump key, or a coin, turn the knob on the battery door clockwise to lock it.
OR if using a rechargeable battery pack, insert it into the pump.
Note: Mixing new and used batteries is not recommended because it may affect low battery alarm times. Always use four new batteries when replacing depleted batteries.
REPLACING THE BATTERY DOOR
If the battery door is removed or needs replacing, simply snap the door onto the bar that is located on the pump.
POWER UP
Press and hold the power switch to turn the pump on. The pump starts the power up sequence during which it performs various self-tests and tests for alarm conditions.
· If any issues are found while the pump is performing the self tests, alarms will sound
· If you believe there is a problem, remove the pump from service and contact Smiths Medical Customer Service
CAUTION: If the power up results in an error message indicating that the protocol library was lost, do not proceed with using the pump. Follow your facility’s procedures for downloading protocol libraries.
POWER DOWN
Press the power switch to turn the pump off. You must acknowledge the “Power down?” prompt by selecting Yes. The pump then powers down.
CASSETTES
The cassette is part of the CADD medication cassette reservoir or CADD® administration set that attaches to the bottom of the pump.
Notes:
· A CADD® administration or extension set with free-flow protection must be used
· A CADD® high volume administration set is required for rates above 250 mL/hr
- Make sure the pump is stopped before removing the cassette
- Close the tubing clamp
- If locked, insert the pump key and turn the cassette/keypad lock counter-clockwise into the unlocked position. “Cassette Unlocked” briefly appears in the status bar.
Note: Only PCA infusions require the cassette to be locked in order to run the pump. - Push down on the cassette latch until cassette detaches
Obtain a new, filled CADD medication cassette reservoir or CADD® administration set attached to a flexible IV bag.
Before attaching a new cassette, make sure the pump is powered on. Once the cassette is attached, the
pump automatically displays screens that allow you to verify the cassette type, prime the fluid path,
reset the reservoir volume, review pump settings, and/or start the pump.
- Clamp the tubing
- Make sure the cassette latch is unlocked then open the latch
- Insert the cassette hooks into the hinge pins on the bottom of the pump, then swing the cassette to the latch position
- Place the pump upright on a firm, flat surface, and then press down on the latch side of the pump so the cassette fits tightly against the pump
- Lift the cassette latch handle into the closed position. If you experience resistance when lifting the cassette latch handle, do not force the latch. If the pump doesn’t latch easily, unlatch the cassette and repeat the process. A message briefly appears in the status bar so you can verify the type of cassette you have attached.
- Verify the cassette is attached correctly. Looking from left to right, the top of the cassette should line up evenly with the bottom of the pump and be securely attached. If an uneven gap exists, unlatch the cassette and repeat the process.
- If you wish to lock the cassette, insert the pump key into the cassette/keypad lock and turn clockwise into the locked position. “Cassette Locked” appears briefly in the status bar.
Note: For PCA infusions, the cassette must be locked in order to start the pump.
PRIME TUBING
When priming the fluid path, the tubing downstream of the pump is filled with fluid, removing any air bubbles. Prime the tubing before connecting it to the patient’s infusion set or indwelling catheter.
Fluid delivered by priming is subtracted from the reservoir volume, but is not added to the amount given because this fluid is not delivered to the patient. Priming is not allowed with the reservoir volume is O ml.
Notes:
· The air detector is disabled while the pump is priming
· If the fluid path contains an air eliminating filter, it is acceptable for air bubbles to be present on the vent side of the filter.
Note: If you are not changing the cassette but wish to prime the fluid path, use the Prime Tubing, No Cassette
Change task.
- When a cassette is attached after the pump is powered on, a “Prime Tubing?” screen always appears
- Select Yes
- Unlock the keypad, if required
- If you have not already done so, disconnect the tubing from the patient, open the clamps and select Prime
- Stop priming at any time by selecting Stop Priming. Priming automatically stops after 10 ml [or 20 ml if a high volume set is attached) are primed. Continue priming as needed.
- Stop the pump if it is running
- In the Tasks menu press or until Prime Tubing is highlighted, and then press Select
- Unlock the keypad, if required
- If you have not already done so, disconnect the tubing from the patient, open the clamps, and select Prime
- Stop priming at any time by selecting Stop Priming. Priming automatically stops after 10 ml [or 20 ml if a high volume set is attached) are primed. Continue priming as needed.
START THE PUMP
Infusion begins when the pump starts. When the pump is running, “Running” appears on the status bar, the graphic on the home screen is green, and the green indicator light flashes. If the pump will not start, a message appears on the display.
Note: Before starting the pump, be sure the tubing is primed and the pump is connected to the patient according to your facility”s standards of practice.
- Press Stop/Start.
Note: If the delivery settings have not been reviewed and the values have not been accepted, you must do so before the pump will run. If a step or taper infusion was previously stopped and delivery was not completed (the infusion was not fully delivered), a screen appears with the message, “Infusion was interrupted before completion. Finish interrupted infusion or start from beginning with new bag.” Select New Bag to reset the reservoir volume and reset the infusion. Or, select Finish to resume the infusion from the point it was at when it was last running. - When “Start Pump?” appears, select Yes
- The pump begins running. The red “Stopped” message in the status bar changes to a green “Running” message, and “Infusion is starting now …” appears briefly on the screen.
If a delayed start was programmed, the display turns green and a message that the infusion is delayed appears briefly on the screen. Then the “Delayed Start” screen appears along with the time remaining until the infusion starts. The pump infuses at the programmed KVO rate.
STOP THE PUMP
-
Stopping the pump stops delivery. After the pump is stopped, “Stopped” appears in red on the status bar, the graphic on the home screen is red, the amber indicator light flashes, and the green indicator light is off.
- Press Stop/Start. In a PCA protocol, if a PCA dose is in progress, “Stop PCA dose?” appears. Select Yes to stop the dose. In a PCA protocol, if a clinician bolus is in progress, “Stop clinician bolus?” appears. Select Yes to stop the bolus. A confirmation screen appears stating, “Clinician bolus stopped.” Select OK to continue. In a taper protocol, “Taper down instead?” appears. Select No to stop the infusion.
- When “Stop Pump?” appears, select Yes
- The pump stops running. The green “Running” message in the status bar changes to a red “Stopped” message, and “Pump is stopping …” appears briefly on the screen.
RESET RESERVOIR VOLUME
Stopping the pump stops delivery. After the pump is stopped, “Stopped” appears in red on the status bar, the graphic on the home screen is red, the amber indicator light flashes, and the green indicator light is off.
- Press Stop/Start. In a PCA protocol, if a PCA dose is in progress, “Stop PCA dose?” appears. Select Yes to stop the dose. In a PCA protocol, if a clinician bolus is in progress, “Stop clinician bolus?” appears. Select Yes to stop the bolus. A confirmation screen appears stating, “Clinician bolus stopped.” Select OK to continue. In a taper protocol, “Taper down instead?” appears. Select No to stop the infusion.
- When “Stop Pump?” appears, select Yes
- The pump stops running. The green “Running” message in the status bar changes to a red “Stopped” message, and “Pump is stopping …” appears briefly on the screen.
TASKS AND ADVANCED TASKS
TASKS MENU OVERVIEW
The Tasks menu leads to most of the pump’s operating functions. Some items in the Tasks menu will require a security code to view/edit the item.
Reset Reservoir Volume - page 28
Taper Down Now (Taper therapy) - page 22
Set Delayed Start (all therapies except intermittent) - page 10
Set Next Dose Start Time (intermittent therapy) - page 10
Prime Tubing - page 26
View Delivery Settings - page 11
Display and Sound Settings - page 29
View Reports - page 32
View Advanced Tasks - page 33
References and troubleshooting
ALARMS AND MESSAGES
The pump can sound multiple alarms. For many of the alarms, you have the option to “acknowledge” or “silence.”
· Acknowledge-the alarm clears from the screen
· Silence-the alarm stays on the screen, but is silenced for 2 minutes before it sounds again
The alarm continues until it is acknowledged or resolved. The alarms may have different sounds depending on the sound theme selected. There are three different sound themes for the alarms and beeps that the pump makes: standard, intense, and distinctive.
· System Fault Alarm
If this screen appears, an unrecoverable error may have occurred, such as a hardware or software fault. The amber indicator light is continuously illuminated during these conditions and is accompanied by an audible two-tone alarm. If a system fault occurs, the fault should be reported to Smiths Medical Customer Service at 1-800-258-5361. To clear this alarm, remove power from the pump by opening the battery door, and if necessary, removing the AC power. Close the battery door and turn the pump back on. If the error code does not repeat, Customer Service may suggest continued use of the pump.
If the error is persistent, the pump must be returned for service.
Note: Document the error numbers displayed on the system fault screen to help Customer Service identify the problem.
· High Priority Alarm
A high priority alarm always pauses or stops the pump if it is running. The alarm is accompanied by a red screen, and it persists until acknowledged by the press of a key on the pump or until the condition that triggered the alarm goes away [for example, high pressure going down). The alarm can be silenced with a key press and will sound again after two minutes if the alarm condition still exists.
· Medium Priority Alarm
A medium priority alarm does not stop the pump if it is running.
The alarm is accompanied by an amber screen, and it persists until acknowledged by the press of a key on the pump or until the condition that triggered the alarm goes away. The alarm can be silenced with a key press and will sound again after two minutes if the alarm condition still exists.
· Low Priority Alarm
A low priority alarm does not stop the pump if it is running. The alarm is accompanied by a blue screen, and it persists for five seconds unless it is acknowledged by the press of a key or the condition that triggered the alarm goes away before the five seconds have passed. (Some low priority alarms persist for longer than five seconds.]
· Informational Message
An informational priority message does not stop the pump if it is running. This message appears in the status bar, and does not display a new alarm screen. It persists for five seconds and may be silent, requiring no acknowledgement. Some informational examples are “Cassette Locked,” and “Cassette Unlocked”.
Additional information may be displayed when certain alarms occur. The help screens describe what you can do to try to solve the current problem that is causing the alarm.
- When an alarm occurs, select Silence to quiet the alarm
- If help screens are available for the alarm, “Help” appears above the right soft key. To view the help screens, select Help.
- Follow the applicable instructions provided on the help screen.
- “Retry Help” appears when no additional help steps are available. To page through the help screens again, press Retry Help. The Alarm screen reappears as in Step 2 above. Repeat Steps 2 and 3. When the alarm clears, the help screens will no longer be displayed.
To page through all available help screens, press Next repeatedly. Press Acknowledge at any time to exit Help.
TROUBLESHOOTING
NOTE: this downloadable guide contains all information PLUS troubleshooting guides, alarms & messaging meaning
Kangaroo Joey
ENTERAL FEEDING PUMP
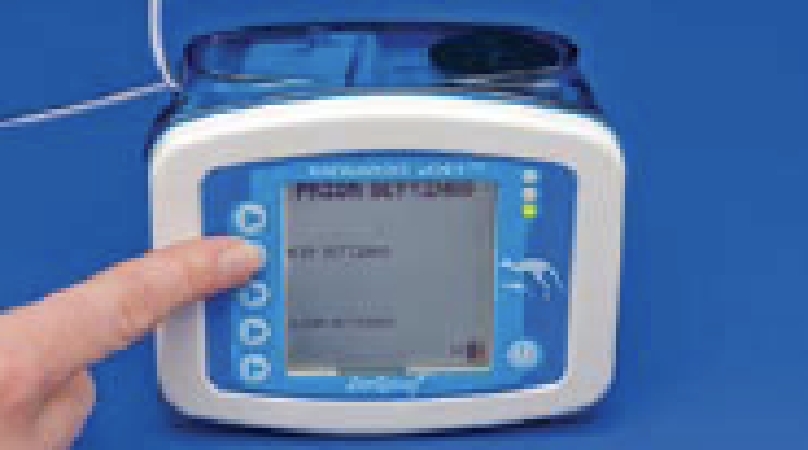
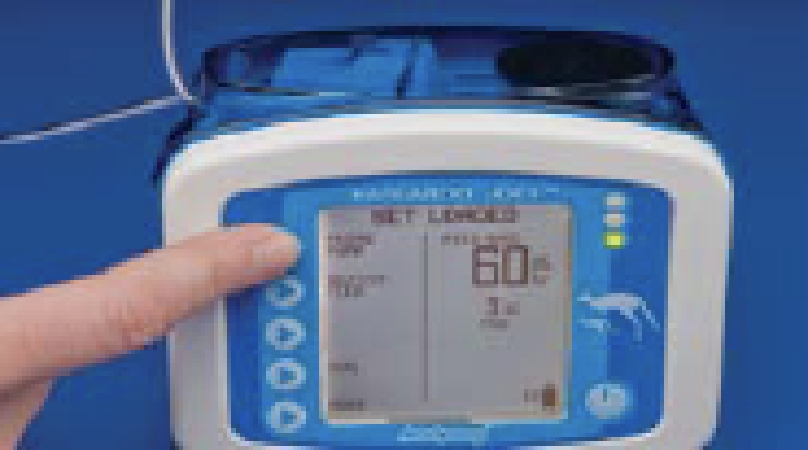
SET LOADING INSTRUCTIONS FOR USE
Follow proper procedures for filling or spiking feed container. Press power button in lower right-hand corner to turn pump on.


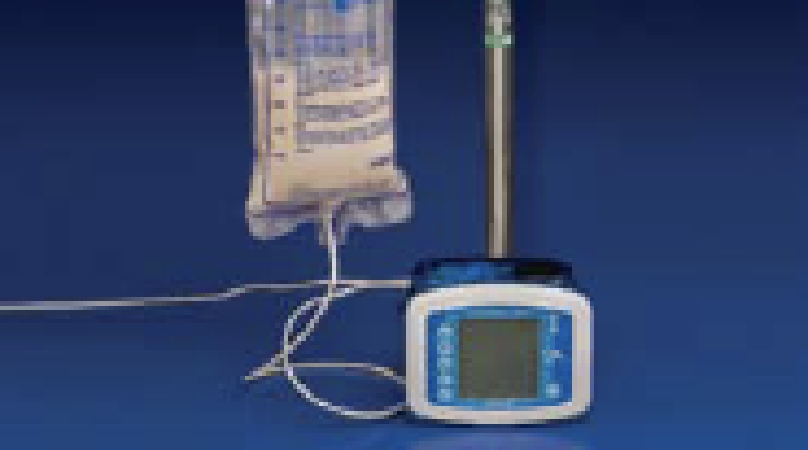
HANG HEIGHT INSTRUCTIONS FOR USE
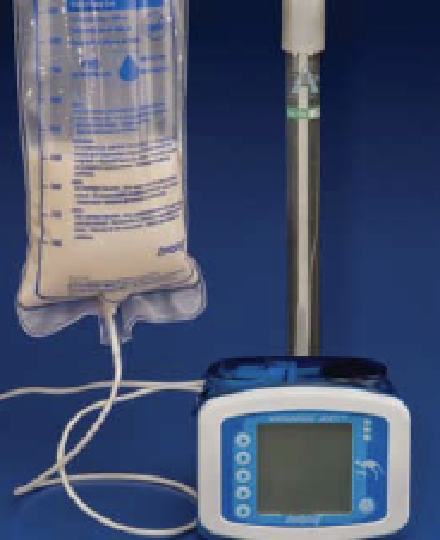
ENTERAL FEEDING & FLUSH PUMP
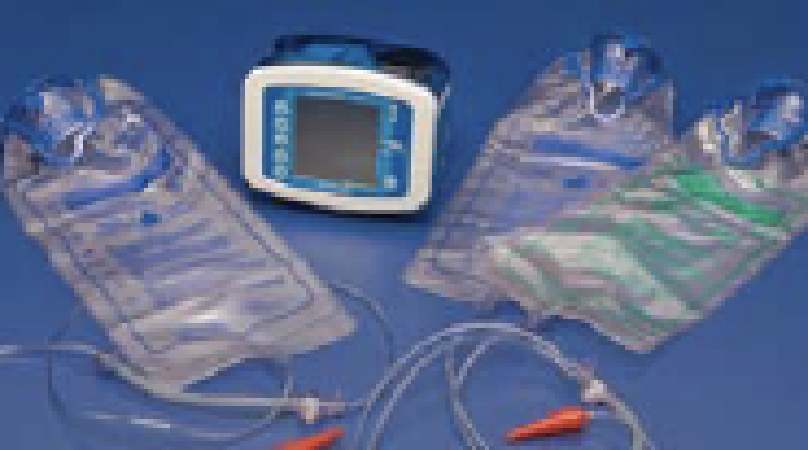
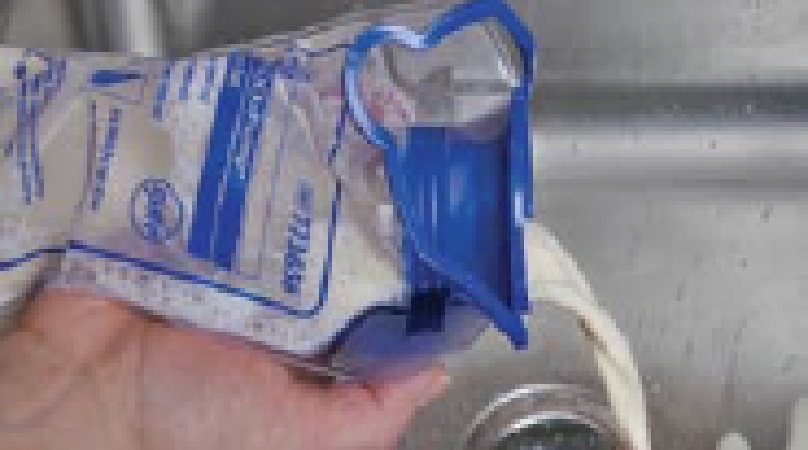
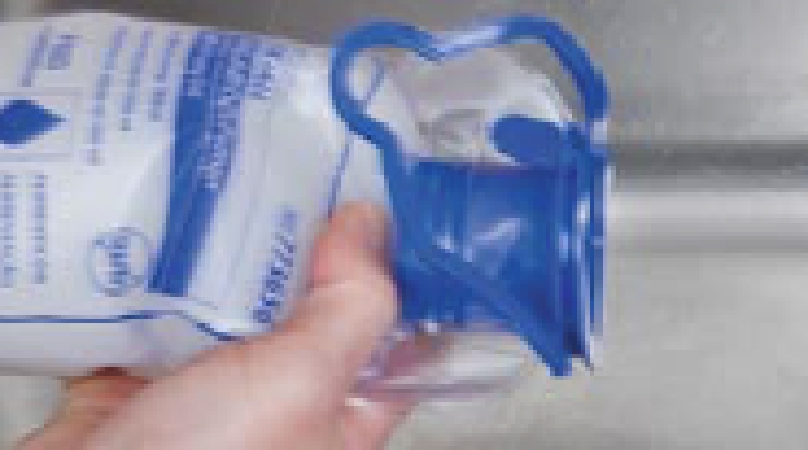
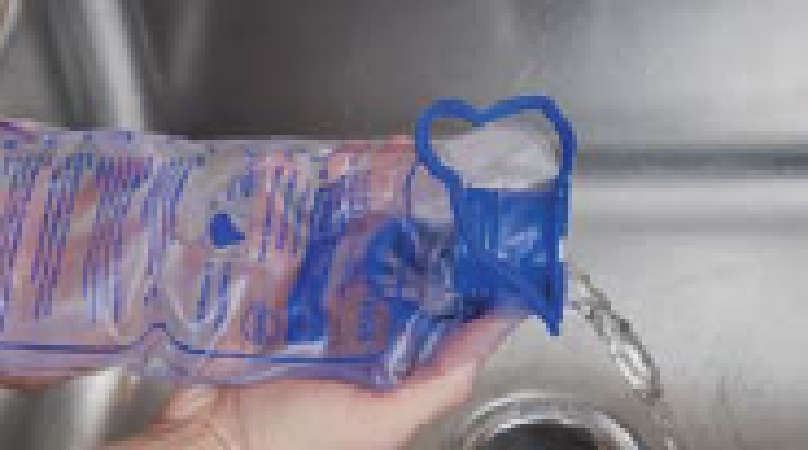
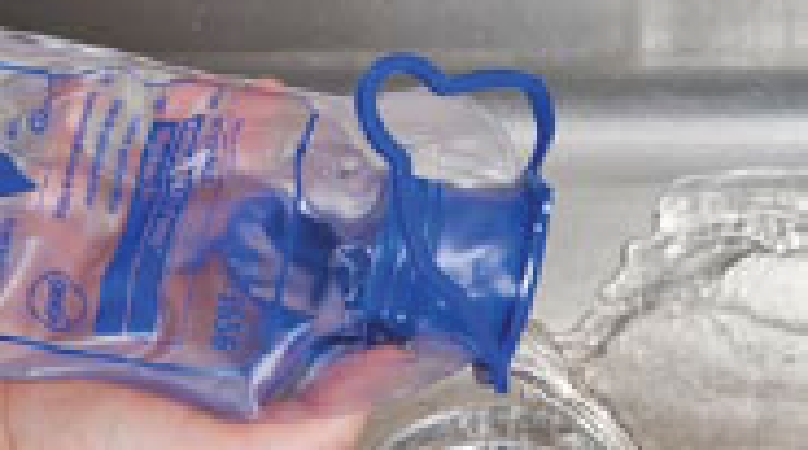
LOADING & RINSING OF FEEDING PUMP
Proper loading & unloading of a feeding set. DO NOT USE FEEDING SETS FOR LONGER THAN 24 HOURS.


Proper rinsing of the feeding set

Enteral feeding pump
NOTE: this downloadable guide contains all information PLUS troubleshooting guides, alarms & messaging meaning
Normal operation “feed only set” directions
BATTERY OPERATION
Unplugging the pump from the AC line will automatically place the pump on battery power. To recharge the battery, plug the pump into an AC wall outlet. Pump will automatically begin charging.
GENERAL INSTRUCTIONS
- Fill or spike feeding container prior to setting up pump.
- Turn pump on - Press Power button in lower right-hand corner.
- In order to achieve proper accuracy, the fluid line in the feeding set bag must be 6 inches above the top of the feeding pump, when initiating the feeding cycle.
- Select “Keep Settings” or “Clear Settings” (for day to day use with the same feeding regimen the “Keep Settings” option should be selected).
- Load the Feeding Set per diagram. Do not overstretch the tubing.
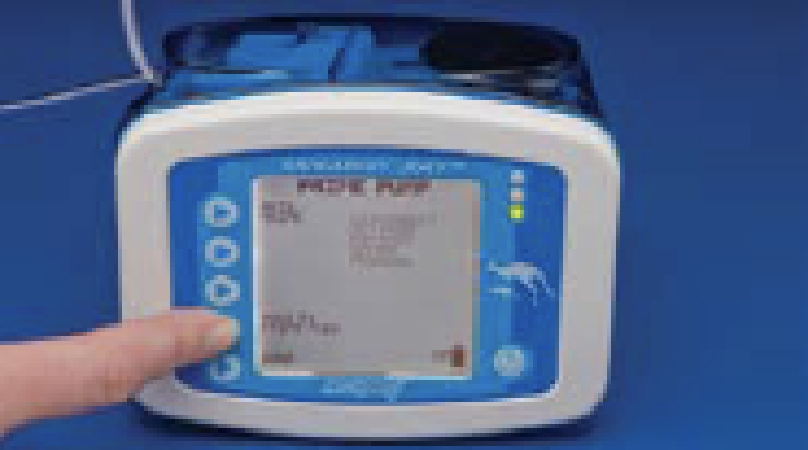
PRIMING THE PUMP
- Press “Prime Pump” to access the pump priming options.
- Press “Auto Prime” to automatically prime the pump set. The pump will quickly prime the feed line and stop the formula before reaching the end of the feeding line.
- Press the “Hold To Prime Feed” menu selection to manually top off the line.
- Press “Done”.
SETTING THE FEED RATE
- Select “Adjust Feed” then “Feed Rate” use the buttons on the left to program the pump from 1 to 400 in increments of 1ml. Select “Enter” when desired rate is set.
Note the Volume To Be Delivered “VTBD” Rate - is an Optional Feature
- Only use the “VTBD” option if you want the pump to stop and alarm once a set amount of formula is delivered.
- Select “Run” you will notice a small drop scroll down the screen when running.
RE-PRIMING THE PUMP AFTER THE FEED BAG EMPTIES
- A pump set bag that has been emptied will trigger the Feed Error screen. In this condition the pump set bag can be refilled to continue the feeding, but only after the pump set has been re-primed.
- Disconnect the feeding line from the patient.
- Refill the bag.
- Press “Continue” to begin the pump running.
- Press “Hold”, then press “Adjust Settings”, then press “Prime Pump”.
- Press “Hold To Prime” to prime the line. (Do Not Use Auto Prime)
- Press “Done”, then select “Run”
To change rate or clear volume
- Select “Hold”.
- Select “Clear Vol Fed” to clear the volume.
- Select “Adjust Settings” to adjust all settings.
- Select “Run” to return to normal operations.
Pump sets should not be reused after 24 hours of initial usage.
Enteral feeding pump
NOTE: this downloadable guide contains all information PLUS troubleshooting guides, alarms & messaging meaning
FLUSHING MODE OPERATION “FLUSHING SET REQUIRED” DIRECTIONS
BATTERY OPERATION
Unplugging the pump from the AC line will automatically put the pump on battery power. To recharge the battery, plug the pump into an AC wall outlet. Pump will automatically begin charging.
GENERAL INSTRUCTIONS
- Fill or spike feeding container prior to setting up pump.
- Turn pump on - Press Power button in lower right-hand corner.
- n order to achieve proper accuracy, the fluid line in the feeding set bag must be 6 inches above the top of the feeding pump, when initiating the feeding cycle.
- Select “Keep Settings” or “Clear Settings” (for day to day use with the same feeding regimen the “Keep Settings” option should be selected).
- Load the Feeding Set per diagram. Do not overstretch the tubing.
PRIMING THE PUMP
- Press “Prime Pump” to access the pump priming options.
- Press “Auto Prime” to automatically prime the pump set. The pump will quickly prime the feed line and stop the formula before reaching the end of the feeding line.
- Press the “Hold To Prime” menu selection to manually top off the line.
- Press “Done”.
SETTING THE FEED RATE
- Select “Adjust Feed” then “Feed Rate” use the buttons on the left to program the pump from 1 to 400 in increments of 1ml. Select “Enter” when desired rate is set.
Note the Volume To Be Delivered “VTBD” Rate - is an Optional Feature
• Only use the “VTBD” option if you want the pump to stop and alarm once a set amount of formula is delivered. - Select “Adjust Flush” then “Flush Volume” to set the volume of water per flush cycle to be administered from 10 to 500 in increments of 1ml. Select “Enter” when desired rate is set.
- Select “Flush Interval” to define the time interval between the start of each flushing cycle from 1 to 24 hours in increments of 1 hour. Select “Enter”, Select “Done”.
- Select “Run” You’ll notice a small drop scroll down the screen when running.
RE-PRIMING THE PUMP AFTER THE FEED BAG EMPTIES
- A pump set bag that has been emptied will trigger the Feed Error screen. In this condition the pump set bag can be refilled to continue the feeding, but only after the pump set has been re-primed.
- Disconnect the feeding line from the patient.
- Refill the bag.
- Press “Continue” to begin the pump running.
- Press “Hold”, then press “Adjust Settings”, then press “Prime Pump”.
- Press “Hold To Prime Flush” until the water has reached the valve in the pump.
- Press “Hold To Prime Feed” until formula reaches the stepped connector at the end of the set.
- Press the “Done”, then select “Run”
TO CHANGE RATE OR CLEAR VOLUME
- Select “Hold”.
- Select “Clear Vol” to clear the volume.
- Select “Adjust Settings” to adjust all settings.
- Select “Run” to return to normal operations.
Pump sets should not be reused after 24 hours of initial usage.
How Can InfusionPlus Help You?
Training Videos
FAQs
